

How do I install a BoxedBeam®?
A BoxedBeam® is slid over a batten fixed to the ceiling or wall and screwed into that batten from both sides. The batten is slightly narrower than the inside of the U-profile; its height does not matter.
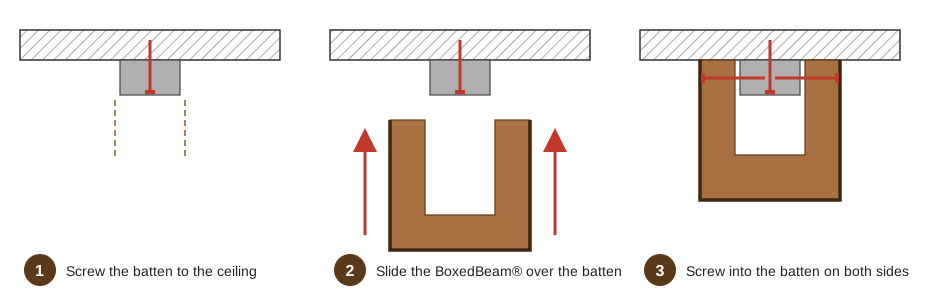
What you need
- Wooden batten or square timber, slightly narrower than the inside of the U-profile
- Screws and plugs to suit the ceiling or wall
- Wood screws for the side fixing
- Drill, spirit level, pencil
- Option B only: drill bit matching the screw head diameter, knot plug or wooden dowel, wood glue
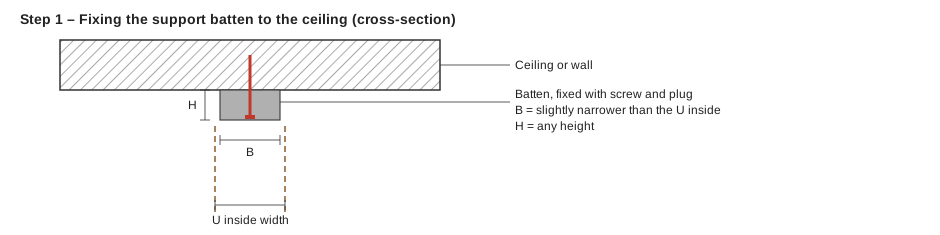
Fix the batten
Fix the batten to the ceiling or wall. It is a few millimetres narrower than the inside width of the U-profile; its height does not matter.
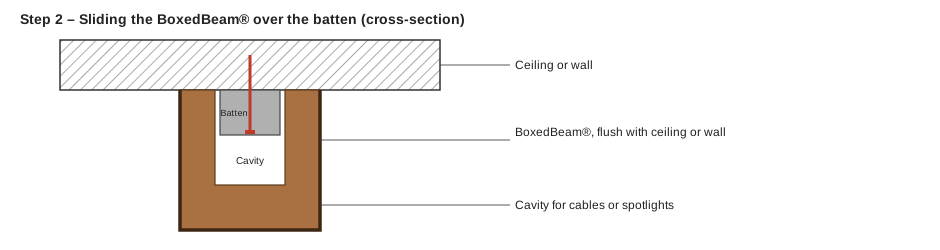
Slide the BoxedBeam® on
Slide the beam over the batten until it sits flush against the ceiling or wall. The cavity takes cables or spotlights if needed.
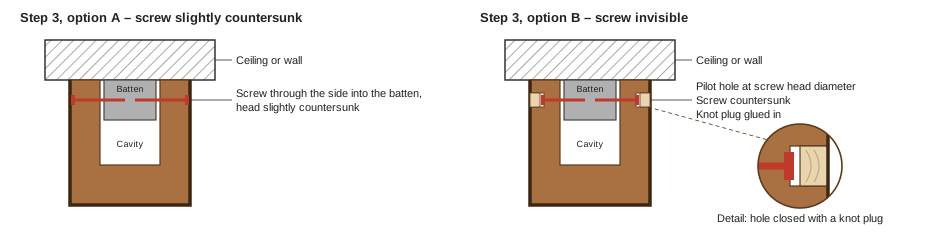
Screw in from the sides
Screw through both sides into the batten. Option A: Countersink the head slightly and it stays barely visible. Option B: Pre-drill at the diameter of the screw head, countersink the screw, close the hole with a knot plug and glue it in. The fixing is then invisible.
Special cases: cladding an existing beam or a steel joist
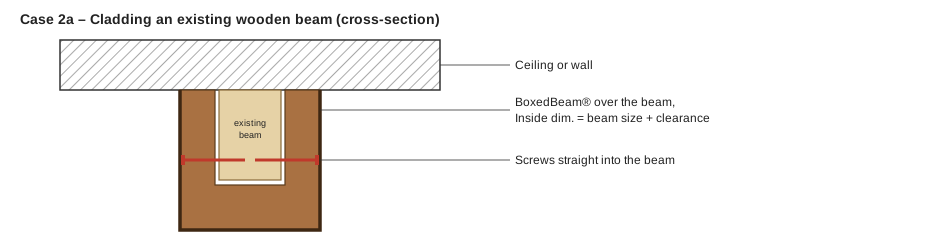
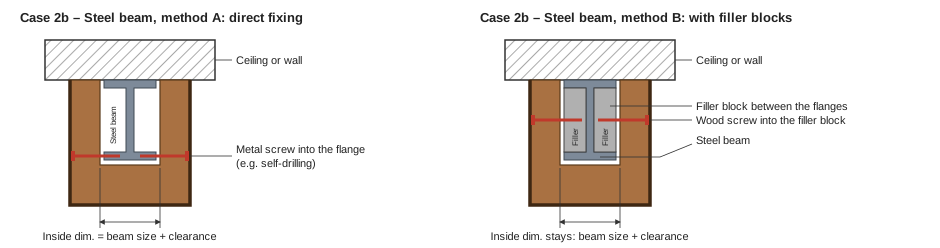
Instead of the batten, the existing element fills the U-profile. The inside dimension then equals the outside dimension of that element plus a few millimetres of clearance. Please state this measurement with your enquiry.
Existing wooden beam
Slide it on and screw directly into the beam from both sides.
Steel joist
Method A: Suitable metal screws, for example self-drilling, into the flange from both sides. Method B: Fit filler blocks between the flanges and screw into them with wood screws. The filler blocks sit inside the profile and add no thickness.
Good to know
- A BoxedBeam® is not load-bearing, it is purely cladding.
- The batten must be fixed in a way that suits the substrate. Concrete, brick, timber and suspended ceilings require different plugs and screws; in plasterboard, fix only into the load-bearing substructure or the structure behind it. This guide shows the mounting principle and does not replace on-site assessment. If in doubt, have the fixing carried out by a qualified trade.
- Spotlights and cables: cut-outs on site, luminaires with heat protection, connection by an electrician.
- Reclaimed wood is a natural product, all dimensions are approximate.
Matching beams are available as BoxedBeam® classic and BoxedBeam® oak.